For personal or testing use recommended. Tested on Debian 13 on a Proxmox VM, Raspberry Pi and a VPS server.
Notes
64 bit system is recommended as the script deals with very large numbers.
To monitor OpenWrt router use router.php and to monitor a local Linux interface use interface.php file.
Before installing make sure the time zone is correctly set otherwise you will get incorrect data because the cron job was NOT using the correct time zone even when the time zone was correctly set for the Linux system. Change the time zone date_default_timezone_set('America/New_York'); in config.php directly to match your local time zone [Full List].
Router Setup
Create a file networkinfo.sh in your OpenWrt router which will transmit Rx and Tx data through an API. Log into your OpenWrt router through SSH and paste the command below in the terminal to create the API.
cat << "EOF" >> /www/cgi-bin/networkinfo.sh
#!/bin/sh
printf "Content-Type: text/plain\n\n"

# Get the physical device name for the 'wan' interface
WAN_IFACE=$(ubus call network.interface.wan status | jsonfilter -e '@.l3_device')

if [ -n "$WAN_IFACE" ]; then
	# Read the RX bytes count from the sysfs entry
	RX_BYTES=$(cat /sys/class/net/"$WAN_IFACE"/statistics/rx_bytes)
	#echo "WAN RX Bytes: $RX_BYTES"
	TX_BYTES=$(cat /sys/class/net/"$WAN_IFACE"/statistics/tx_bytes)
	#echo "WAN TX Bytes: $TX_BYTES"
else
	echo "Could not find WAN physical interface."
fi

echo "{"
echo "\"rx_bytes\": \"$RX_BYTES\","
echo "\"tx_bytes\": \"$TX_BYTES\""
echo "}"
exit 0
EOF
chmod +x /www/cgi-bin/networkinfo.sh
Instead of SSH you can also manually copy networkinfo.sh file to /www/cgi-bin/networkinfo.sh using WinSCP and chmod permission to 755. Now open a web browser and open http://192.168.1.1/cgi-bin/networkinfo.sh (your routers IP address) and check if the data is correctly displayed. You will need to upload / chmod the networkinfo.sh file after every sysupgrade, or to preserve it on every sysupgrade go to OpenWrt > System > Backup / Flash firmware > Configuration and add the line /www/cgi-bin/networkinfo.sh at the bottom in the config text area.
Bandwidth Monitor Install
Upload rest of the files in /var/www/html/BandwidthMonitor. After uploading a blank database should already work for you, if you need to recreate it run setup.php again to create the SQLite database. The password should be generated on the first run inside setup.php file, view it in your file editor from your web server. Change the IP address to your router's IP address in $url = 'http://192.168.1.1/cgi-bin/networkinfo.sh'; in config.php
Cron job setup
If you want to monitor a local Computer interface instead of OpenWrt router then switch from router.php to interface.php, and replace the name of the interface in line 4 (ens18) in interface.php file.
Add new hourly cron 0 * * * * /usr/bin/php /var/www/html/BandwidthMonitor/router.phpCopy
If you want to probe the router on a different schedule, like every 3 hours use this example
Add new hourly cron 0 */3 * * * /usr/bin/php /var/www/html/BandwidthMonitor/router.phpCopy and change the value of $ProbeInterval = 1; to $ProbeInterval = 3; in file router.php or interface.php depending if you are monitoring a router or a local interface.
Now in your web browser open http://yourwebserver/BandwidthMonitor and see if it works, give it few hours for the data to populate.
This is just a hobby project I made and not made for accurate data measurement. If you see any calculation mistakes and find a solution send me a PR.
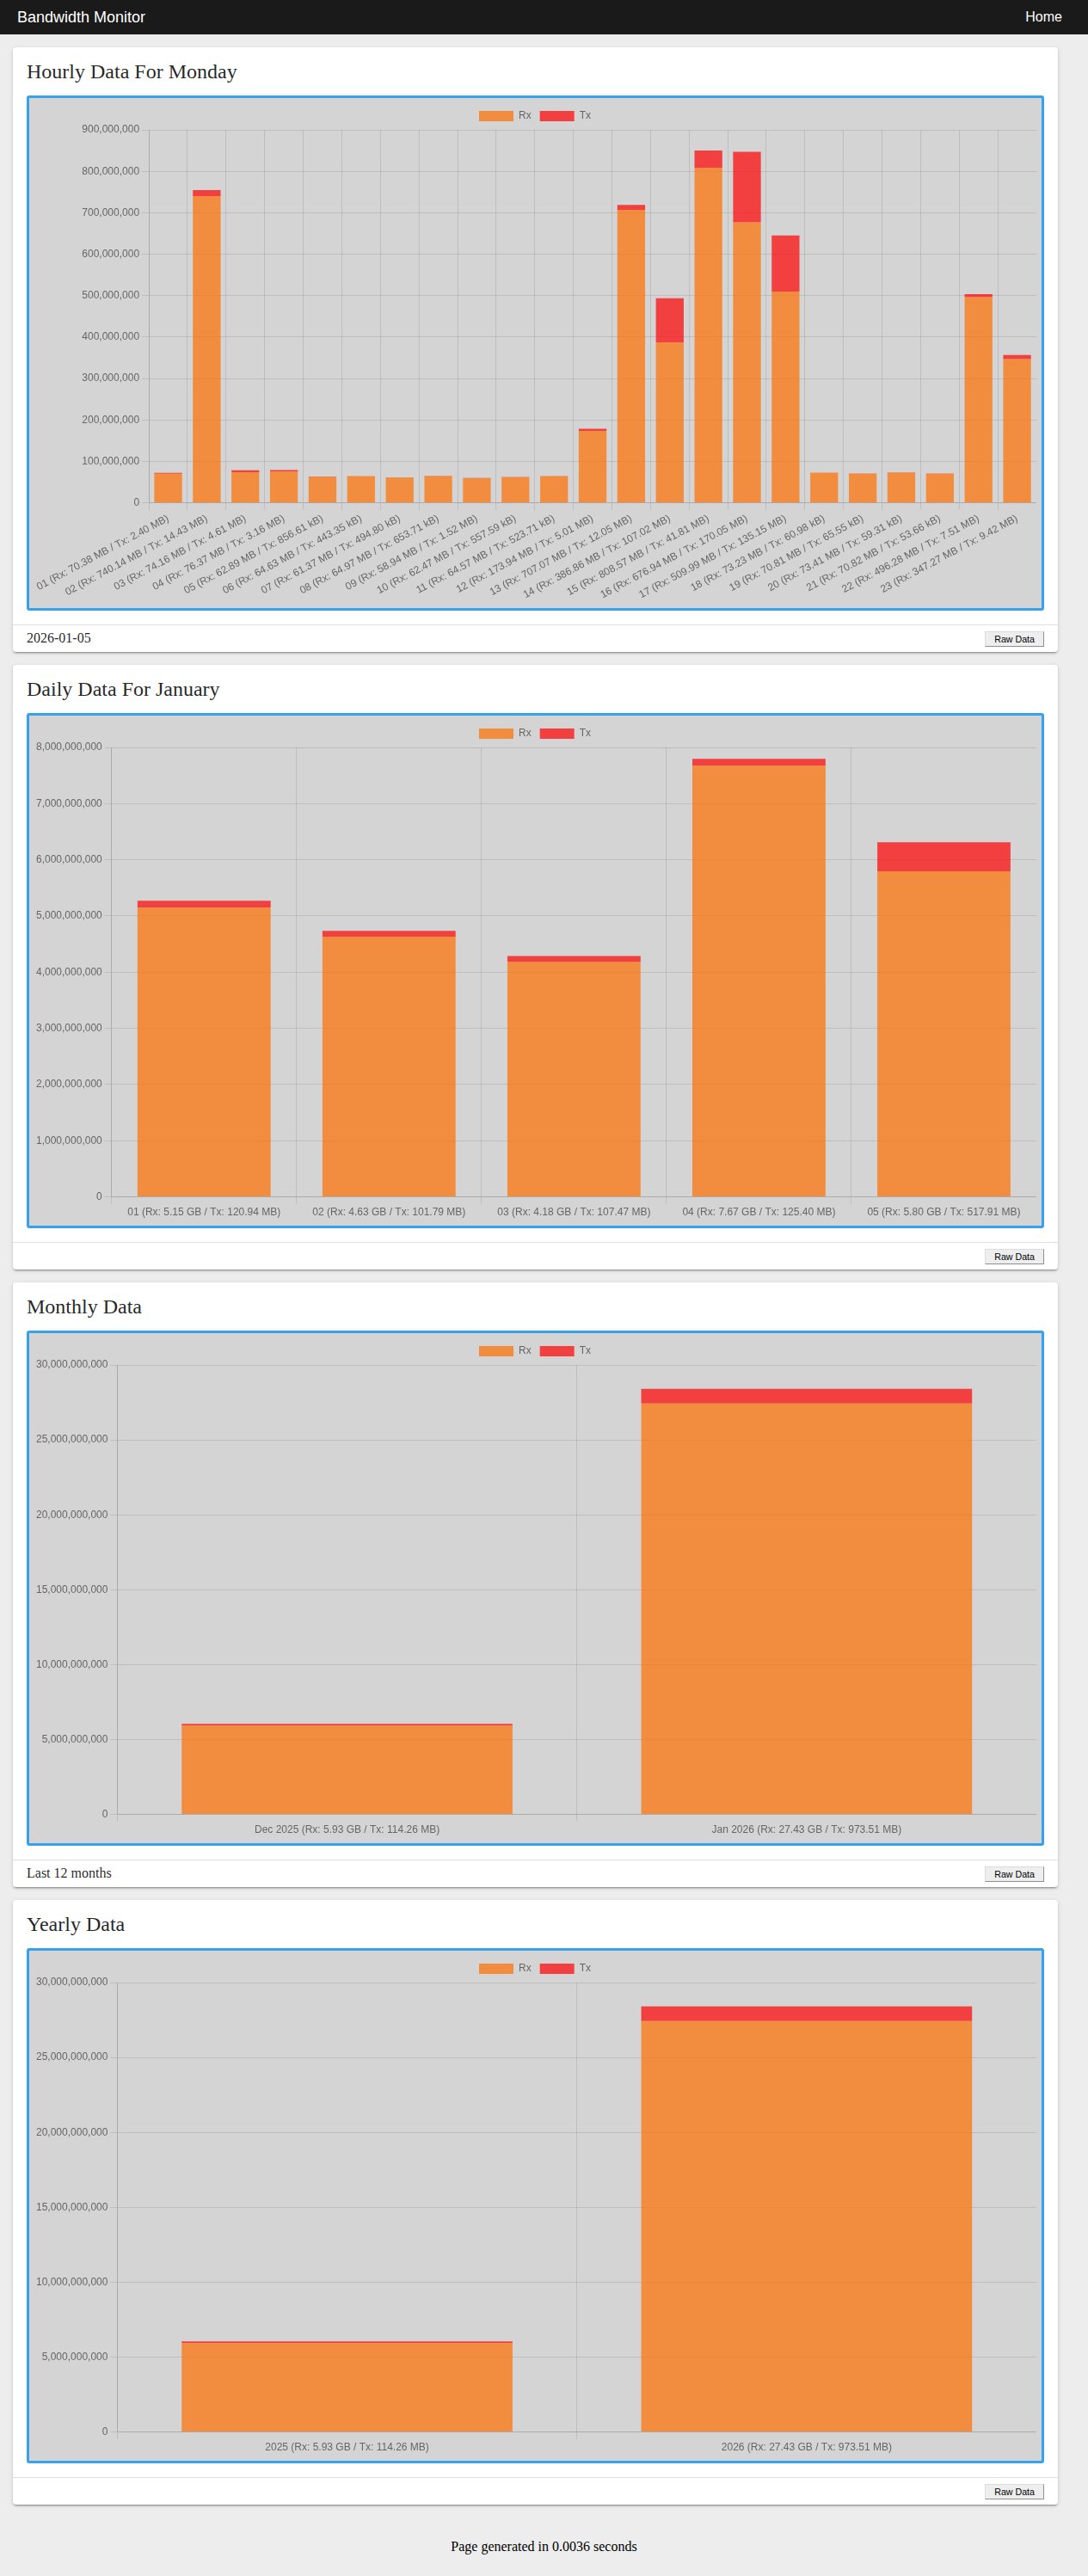
Screenshot
Let me know if you have any comments or if there is any error in this guide.